
Comprehensive Guide to Metal Wire Handrail Installation in Your Home
Metal wire handrails offer Tukwila homeowners a stylish, safe, and low-maintenance upgrade that increases home value, withstands the Northwest weather, and meets strict local codes—when properly planned and installed. With smart material choices and thoughtful design, these systems combine form and function for a sleek, lasting solution indoors or out.
Thinking about installing metal wire handrails in your home?
You're not the only one. I've had three clients in Tukwila this year alone ask me, “Is this safe for kids and pets?” followed almost immediately by, “Is it going to rust in our crazy wet winters?”
If you’ve ever said, “I want to add wired handrails in my house,” this is exactly what you need to read before lifting a drill or calling a contractor.
Let’s break this down from the start—from function to finish—and I’ll bring in some hard-earned insight from real jobs I’ve done here in the Pacific Northwest.
Why Metal Wire Handrails Are More Than a Style Statement
Adding metal wire handrails does more than make your stairs or deck look sleek and modern.
They:
- Prevent serious injury by providing safety on stairs, balconies, and raised surfaces
- Make your home more accessible to young kids, aging parents, or anyone with mobility issues
- Boost your home's resale value with a highly desirable look
- Require minimal visual space, so your views don’t get blocked
Tukwila’s mix of rainy months and older homes with dated wood rails is the perfect reason locals are swapping to cable-style railings.
I once had a homeowner just south of Tukwila call me after her toddler got his head halfway through a wide-spaced wood baluster. She made the switch to stainless steel wire rails the same week—safe spacing fixed the issue and upgraded her cramped 90s stairwell into something right out of a design magazine.
Bottom line: safety and design don’t have to be a trade-off.
Before You Buy Anything: Plan Around Code, Space, and Weather
Here’s a mistake I see all the time: people fall in love with a Pinterest-perfect cable railing, order a bunch of parts online, and only later find out the layout doesn’t meet code—or worse, doesn’t actually work for their stair or deck.
Take 30 minutes to plan things out properly:
Clarify what part of the home needs railing
- Main staircases need to handle more foot traffic than a back deck spiral stair
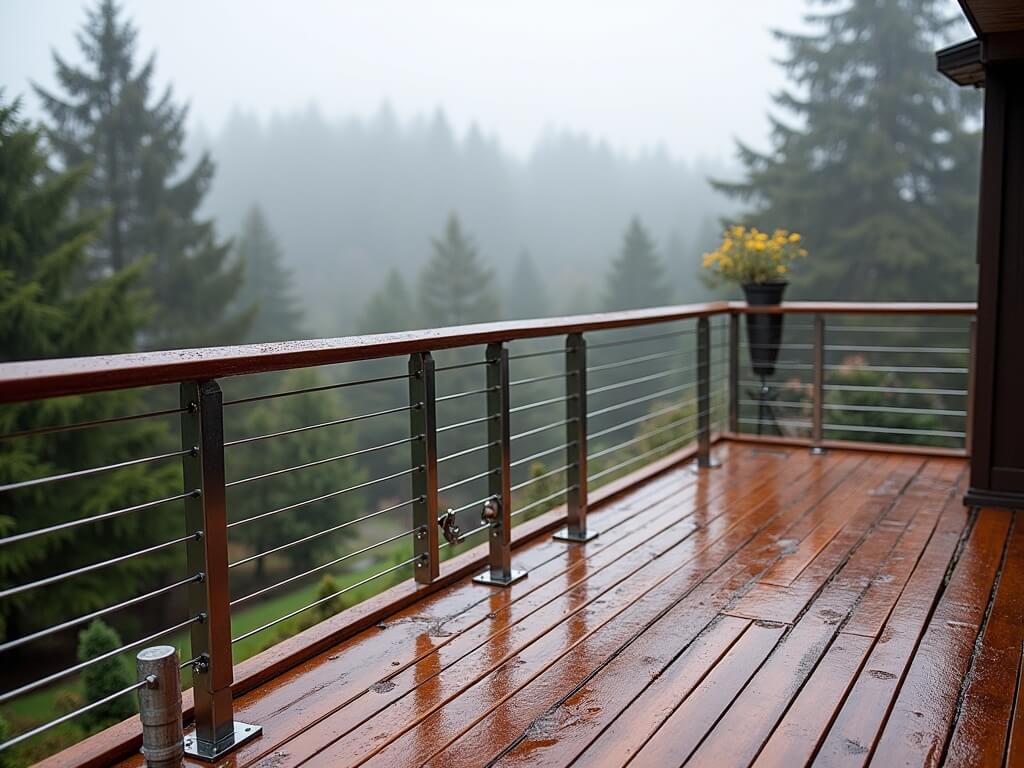
- Railings on outdoor decks will need to take more punishment from weather
- Understand who’s using it—kids, aging parents, pets? Your layout may need vertical cables or tighter gaps
Tukwila building code matters
- Rail height must be between 36 and 42 inches
- Cable spacing should never allow a 4-inch sphere to pass through—this protects toddlers especially
- You'll also want a permit for most permanent installs, especially exterior deck upgrades
Match design to your home’s vibe
- Going for a modern minimalist look? Clean stainless or black powder-coated brackets pop
- Want some warmth? Wood top rails or posts with cable infill is a great hybrid style
- Indoor stairs? Consider square vs. round rail profiles that match existing trim
Key takeaway: If your railing doesn’t meet code, it won’t pass inspection—and even worse, it can become a liability.
Budgeting Smart: What It Really Costs (and Where It Can Spiral)
The phrase “cable railing cost” is highly variable—but most Tukwila homeowners I work with end up somewhere between $110 and $190 per linear foot. Here’s what that price typically includes:
Basic material costs range like this:
- Stainless steel handrails: ~$20 per linear foot
- Posts (stainless): $110–$230 each
- Hardware (tensioners, brackets, anchors, end caps): $200–$500 for an average stair or deck
Cost drivers you should prepare for:
- Corners: Every turn in your railing = more posts, more brackets, more labor
- Custom fabrication: Angled stairs or uneven walls? Off-the-shelf kits may not cut it
- Removal of old rails: Especially common in older homes with rot or custom mounting
Want to stay on budget?
- Skip unnecessary corners in your layout
- Mix materials (wood posts with metal wire) for both warmth and lower cost
- Choose prefabricated kits if your layout is straightforward
A homeowner in Allentown (a neighborhood just east of Tukwila) saved nearly 40% by swapping aluminum posts for wood and limiting their zigzag stair to two turns instead of four. The railing still turned out stunning—and code-compliant.
Big picture: A clean design with fewer cuts, corners, and custom parts trims both time and cost.
Picking the Right Type of Metal Wire Handrail System
Not all wire railings are created equal.
Here are some solid options that balance durability, design, and code compliance:
Horizontal cable railing (most common)
- Modern look, clean horizontal lines
- Best on decks and straight staircases, where climbing risk is low
- Watch out if you have curious kids—it can act like a ladder if rail isn’t installed properly
Vertical cable railing
- Less common but growing in popularity
- Safer for children and won’t encourage climbing
- Slightly more expensive and can be harder to tension evenly
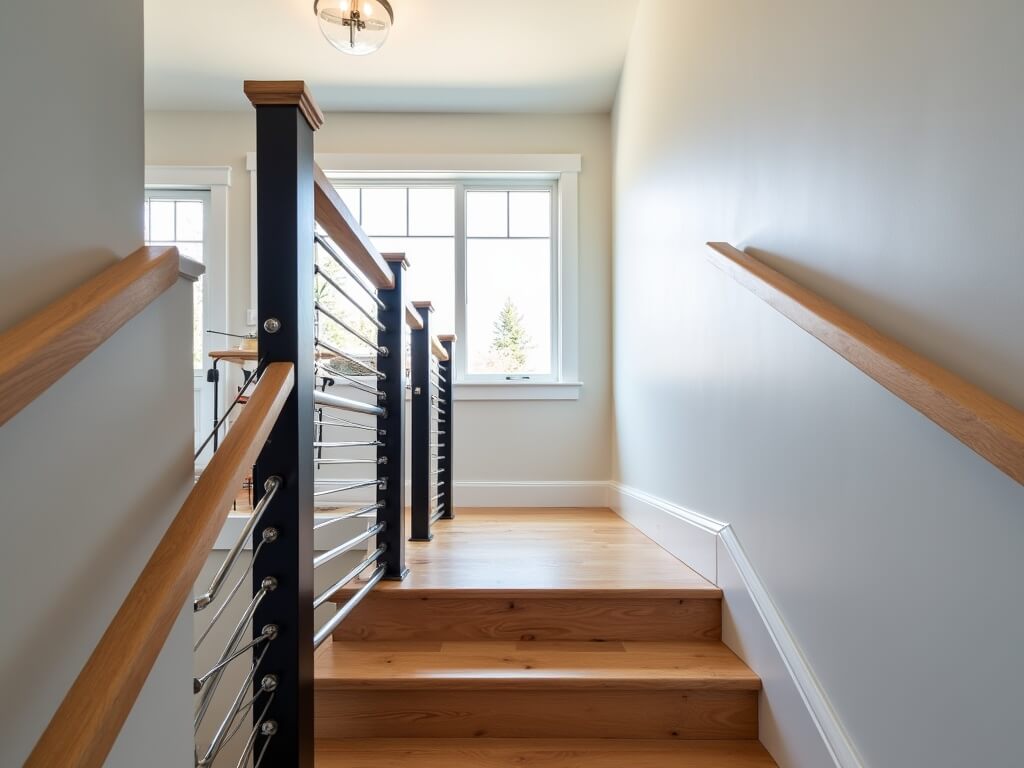
Hybrid styles (wood + wire)
- Combine warmth of wood or composite posts with modern cables
- A cost-effective way to soften the look without compromising safety
- Stainless cable in wood posts works great for indoor stairs
Hands-on, here’s my advice: Outdoor decks in Tukwila should favor full stainless steel cable systems for weather-resistance. For interior stairs or design-heavy spots like entry foyers, a wood-post hybrid gives you flexibility and warmth without sacrificing design.
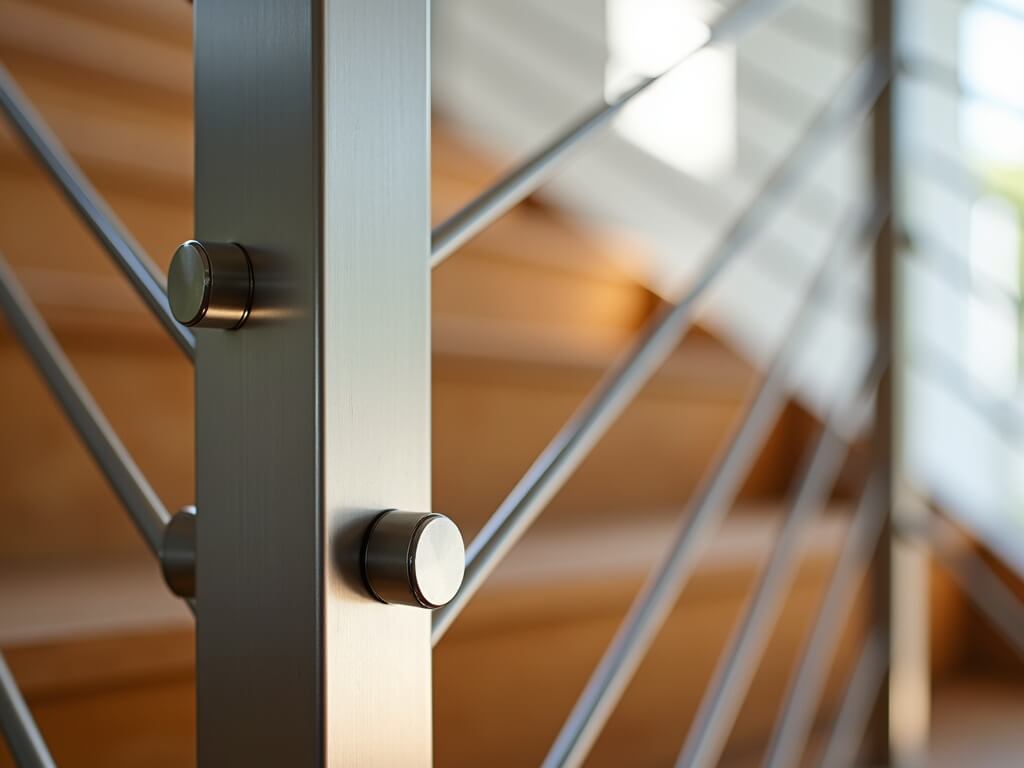
Component Deep-Dive: Know What You’re Really Installing
You’d be surprised how many pieces go into a clean cable handrail installation.
Here’s what’s in the average setup:
Posts
- End posts: carry most of the tension load—must be sturdy
- Intermediate posts: help maintain spacing but don’t hold as much tension
- Corner posts: require double termination hardware—this adds cost
Handrails
- Round profiles are easier on the hand, but square edges often match modern interior trim
- Stainless or aluminum are solid choices—powder coat for exterior protection
- Top rail = key structural and design element, plays big into budget and code
Cables + hardware
- Tensioners, anchors, turnbuckles, lag screws for wood, compression anchors for steel
- Protective sleeves or bushings are needed at contact points
You’ll also need:
- Cable cutter
- Cable crimper/swager
- Tension gauge (or skilled fingers—I’ve done this enough to spot when it’s “just right”)
Off-the-shelf kits vs. custom fabrication
- DIY kits: great for decks or simple stair runs; come pre-engineered for code spacing
- Custom builds: needed if you have runs over 30 feet, unusually steep stairwells, or odd turns
I once worked on a 1910 craftsman near the Tukwila city center. Its narrow staircase with three landings didn’t fit any prefab cable rail kit. We had to template every post on-site, then fabricate a custom handrail from brushed stainless. Cost three times more, but still less than replacing the entire staircase without code-compliant protection.
TL;DR—don’t assume “cable railing” means one-size-fits-all.
Next up: the real-world process of cable handrail installation and what Tukwila homeowners need to watch out for during prep, mounting, tensioning—and crucially, inspection. Let’s get into the labor and logistics.
Related Resources for Further Reading:
The Silent Killer of Cable Rail Projects: Skipping the Finishing Steps
Here’s where even well-executed installs can go sideways.
You’ve got the posts in. Cables tensioned. Everything looks sleek.
But if you don’t finish strong, two years later you’re staring at rust stains, loose wires, or handrails shifting on their mounts.
Inspection matters.
Not just for resale or safety—but to pass final approval if you needed a permit (which in Tukwila, you probably did).
What I always triple-check before signing off:
- Top rail height (most homes aim for 36" indoor, 42" outdoor)
- Cable spacing (no wider than 4")
- Cable tension—firm but not bending posts inward
- Secure hardware attachments—no wiggling brackets or screws backing out
- Rail continuity—especially on landings, where breaks in flow can trip people
Then comes the real secret: maintenance prep.
Before I leave a jobsite, I give homeowners a simple cable railing care schedule:
- Clean stainless surfaces 1–2x per year with mild soap and a soft cloth (no wire brushes)
- Inspect for loose tension or post movement each spring
- Apply corrosion guard to posts in coastal/wet areas once a year (I like Boeshield T-9)
For powder-coated aluminum pieces, just wash and rinse—no harsh chemicals needed.
If you go with wood posts? Seal them annually or as needed. PT pine and cedar can hold up, but water intrusion is unforgiving.
Small habits = long-term durability.
One client on Southcenter Parkway told me three years after install: “I didn’t think I’d need to touch it, but following your checklist kept it looking as good as the day you installed it.”
That’s the ideal.

What Every Tukwila Homeowner Asks Me (and What I Tell Them)
“Is cable railing safe for my toddler or dog?”
Yes—if it’s built right.
Vertical cables or tighter horizontal spacing (with fewer than standard passes between posts) can reduce climbability risks.
Some families add plexiglass panels or wire mesh temporarily when kids are really young.
Regardless, check that no cable allows a softball-sized item (4") through.
“Is rust a problem around here?”
It can be—but not if you choose smart materials.
That’s why I almost always recommend 316 stainless steel over 304.
It’s marine-grade, built for areas like ours with lots of rain and coastal exposure. Powder-coated aluminum is another solid outdoor option.
“Will this add value to my home?”
Yes—if it’s clean, code-compliant, and stylish.
Buyers love the modern look, especially on open stairs and outdoor decks. I’ve seen homes appraise 3–5% higher post-remodel after a railing upgrade paired with other cosmetic improvements.
Bonus: You don’t have to refinish or repaint these like wood balusters.
“What does it cost to keep it in good shape?”
Minimal.
Maybe 1–2 hours a year to clean and check tension. Less if it’s covered.
No staining, painting, or seasonal rebuilds—and replacement components are standardized.
TLDR: Safe, durable, value-adding—and basically maintenance-light.
Why Cable Railings Aren't Cheap (But Are Still Worth It)
Let’s be real.
Compared to a basic pine baluster railing? Cable systems cost more.
But homeowners don’t keep calling me for budget pine balusters.
They call for clean lines, better sightlines, and a low-maintenance safety solution that makes their home feel upgraded.
The upfront cost is higher—but here’s what balances the scale:
- No constant re-staining or repainting
- Stainless steel cables last decades if tensioned and maintained properly
- Contemporary styling that makes listings pop on Zillow
- Ideal for aging-in-place designs or young families
I had a couple off Interurban say: “We were trying to decide between cable railings or replacing the whole old deck setup.” They chose a cable infill system with new cedar posts and saved $12,000 over a full deck rebuild. Deck passed inspection. Home value went up.
Sometimes the value isn’t just what you install—but what it lets you skip.
The Trends That Are Shaping Cable Rail Design in 2024 and Beyond
Here’s what I’m seeing more of in my current projects:
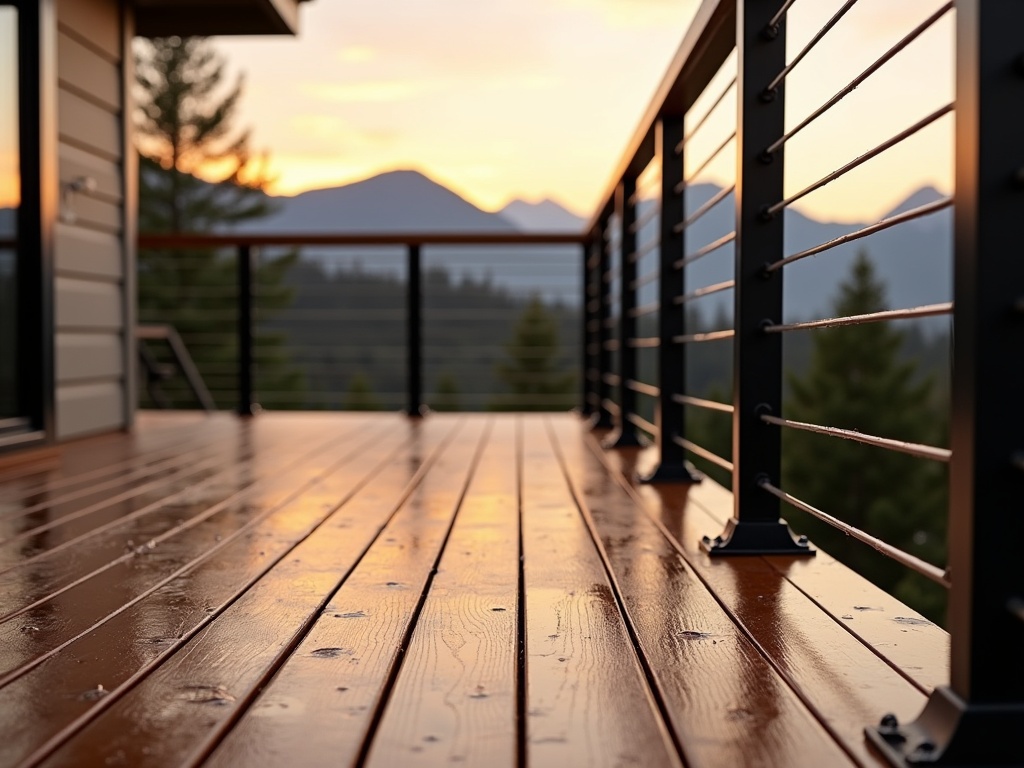
Stainless steel is still the king—but aluminum hybrids are gaining ground fast because of cost and weight.
More people are asking for powder-coated hardware in matte black or bronze—it adds contrast and pairs beautifully with both gray-painted homes and natural wood decks.
And yes, tech is creeping in.
I just finished a railing job in Allentown where the top rail had an integrated LED strip wired into a stair motion sensor. Ultra-slick. Fully weather-sealed. And code-compliant.
Here’s what’s coming down the pike:
- Smart lighting built into newel posts and rails
- Eco-focused builds using recycled aluminum and sustainably harvested wood
- Magnetic latch gates for pet safety
- Pressure-tension sensors for commercial-style monitoring
If you’re planning a full remodel or new build? Pre-wire for lighting now. It’s way cheaper than trying to add it later.
Real Homes. Real Results. Real Lessons.
Let me give you a real-world example that says it all.
I worked with a family in Tukwila who had a split-level with a tight interior stairwell leading up to the main living space. The space felt dim and dated.
We installed a horizontal stainless cable system with square-edge maple posts stained dark espresso.
The moment the old wood balusters were out, light flooded the stairwell. We added a light pipe LED up the underside of the top rail.
The result? Safer for the couple’s aging parents. Way sharper profile for guests. And a huge design lift for less than $6,500.
That staircase now gets complimented on every open house.
What I learned?
Sometimes the smallest upgrades carry the biggest impact—especially when they combine safety, style, and sustainability.
Thinking About Installing One? Here’s What to Do First.
My checklist for any homeowner considering wire railing:
- Walk your space with a tape measure and notepad—note corners, lengths, stairs, and who uses it.
- Check Tukwila building code or call your local permitting office.
- Decide if DIY is realistic or if a designer/contractor should step in.
- Ask yourself what style fits your home, not just your Pinterest board.
- Don’t skip the maintenance plan—it’s your long-term win.
Then?
Call a certified builder or railing system supplier with local expertise.
Someone who can run mockups, get real materials to feel/see, and walk you through the details—because trust me, they matter.
The Bottom Line on Metal Wire Handrails in Tukwila
Handrail upgrades are one of the most overlooked (but highest ROI) improvements.
They can make your home safer to navigate, more open-feeling to live in, and more valuable when you sell.
Metal wire handrails, when planned correctly, installed to code, and finished with care—deliver on all three.
Whether you’re replacing a rickety 90s railing, building a new deck, or doing a modern interior remodel, cable handrails can transform your space.
Just remember: looks matter, but safety and compliance are non-negotiable.
If you’re serious about upgrading your home—especially here in the Northwest—metal wire handrails are one of the smartest long-term investments you can make.
And yes—they absolutely hold up in Tukwila’s wet winters.
For more guidance, coded designs, or permit-ready plans, work with a local pro who understands what type of metal will last, which tension systems pass, and what layout keeps your family safe.
A custom-built wire railing system isn’t just a trend—it’s a future-proof, modern solution that turns your stairs or deck into a statement.
Explore more with our fence, gate, and railing installation services or custom metal fabrication options.
Looking for cost breakdowns? Check out the Complete Cost Guide for Wire Handrail Systems and Installation and Metal Wire Handrail Installation: Pricing and Material Breakdown.
Need repairs or replacements? Visit our repair services or explore more about custom iron railings on our blog.
LET'S MAKE SOMETHING GREAT TOGETHER
Contact us today to discuss your custom metalwork project in Kent, SeaTac, Renton, Newcastle, Bellevue, or anywhere in greater Seattle.
Our friendly and knowledgeable team is ready to guide you through the design process, provide a detailed quote, and bring your vision to life. Let us help you create a lasting legacy of beauty and functionality for your residential or commercial property.
.avif)


contact us

Phone Number
(253) 600-9959

Opening Times
Mon - Sat 8am-5pm
.svg)
Contact
sales@goldenironwork.com